Take advantage of Afterpay to grow your business and convert customers who might be on the fence about your products.
What is Afterpay?
Afterpay works like Layby, except customers receive the purchase before they have finished paying for it. It’s one of the world’s fastest growing payment methods which you’ll see at many of your favourite online stores (some in-store too). If your customers choose to pay with Afterpay, each purchase will become their’s to take home as normal; but they have eight weeks to pay off the total purchase price.
What makes the payment method great, is that it’s all automatic. Once customers make an account, all the payments will be deducted from their credit card or bank account on a nominated day. Afterpay will even send text messages before they withdraw the funds, and unlike a credit card, you don’t have to worry about making payments, Afterpay does automatically.
What Benefits Does Afterpay Bring Your Store?
With flexible (and more affordable) payment options, compared to full upfront payments, it really opens endless possibilities of increased sales and new customers.
Convert customers that would have otherwise abandoned, and generate more sales from the existing customer base and new customers.
With guaranteed up-front payments, Afterpay settles with retailers quickly and automatically, no complicated processes or lengthy wait times.
Afterpay also offer zero fraud or credit risk, i big plus especially for startups. Afterpay assumes all end-customer non-payment risk for every single transaction.
How To Integrate Afterpay With Shopify
With Shopify fast becoming the eCommerce platform of choice for many Australians, the eCommerce giant has streamlined many of its payment gateway integrations.
Afterpay’s integration with Shopify is easy to setup and the steps below will guide you through the process.
Step 1:
Sign up as an Afterpay Retailer – click here to register.
Step 2:
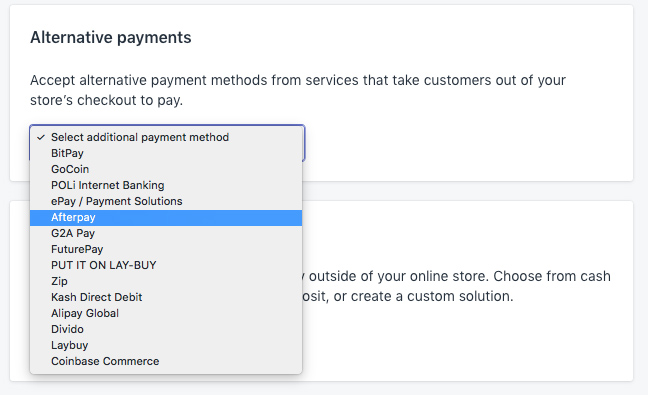
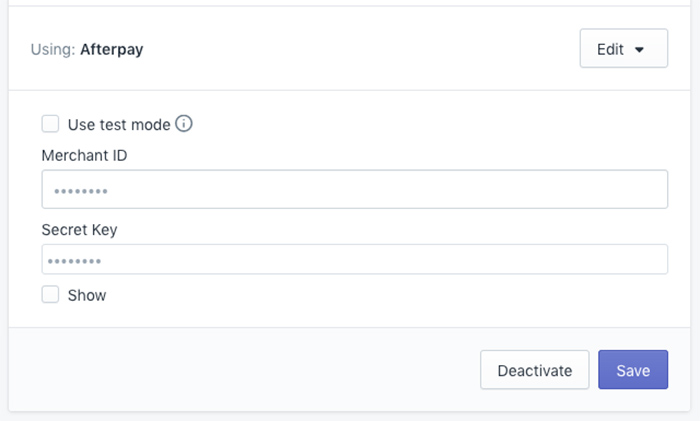
Once you’re setup with a retailer account, you will need to login to Shopify and add the new payment method. Head to Settings > Payment Providers > Alternative Payments and select ‘Afterpay’.
Step 3:
Next you will need to enter your Merchant ID and secret Merchant Key. These values are supplied once retailer registration has been verified and approved by Afterpay.
Step 4:
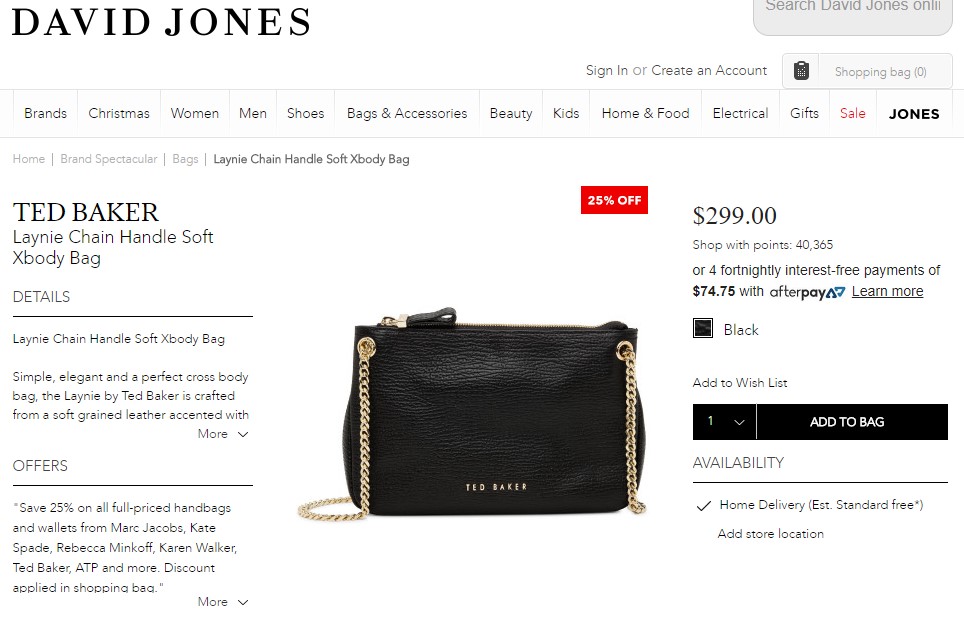
Implement the dynamic logo with theme. This step can get a little tricky and if you’re not comfortable with Shopify’s liquid code it may be worth getting an expert to help. Head to your theme (Online Store > Theme > Edit Code). Afterpay will issue documentation for this step and include a direct link to the Shopify script. This script is used to integrate with the Shopify product template, it can seen here. Next you will need to find the product pricing and add to cart button in your product template and insert the Shopfiy script. Save the file and refresh your product page, it should look like something below.
Step 5:
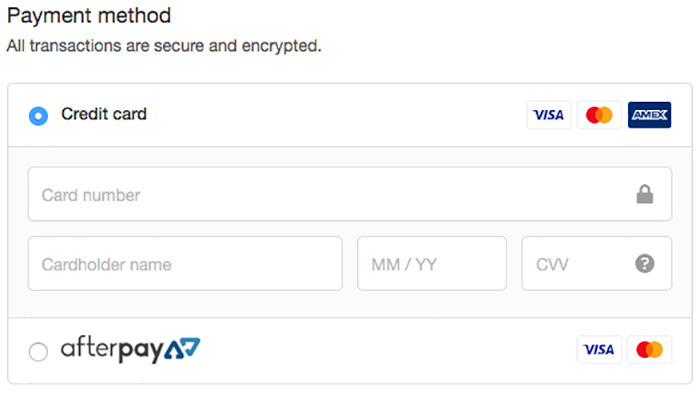
Last step is to run through the checkout process to ensure Shopify handles the checkout redirection. On the Shopify payment options page you will now notice the Afterpay option.
Looking to get Afterpay setup with your online store? The first step is to apply for an Afterpay merchant account online here. OnePoint Software Solutions offer premium eCommerce development right here in Brisbane Australia. Call our Carole Park office today and speak to a Shopify expert. Contact OnePoint online today, or call our office on (07) 3444 0045.
